
Let me tell you about my absolutely favorite bread to bake and share: the Honey Walnut Sourdough Bread Recipe (Sweet, Nutty & Spiced) Recipe. It’s a tantalizing combination of tangy sourdough, the natural sweetness of honey, the irresistible crunch of toasted walnuts, and a gentle hint of warm cinnamon. This loaf isn’t just bread—it’s a cozy experience, perfect for breakfast, afternoon tea, or as a comforting snack anytime you want something a bit special. The aroma alone will fill your kitchen with joy, and the texture is perfectly chewy with a golden crust. Honestly, once you try this recipe, it’ll become a staple in your baking routine.
Ingredients You’ll Need
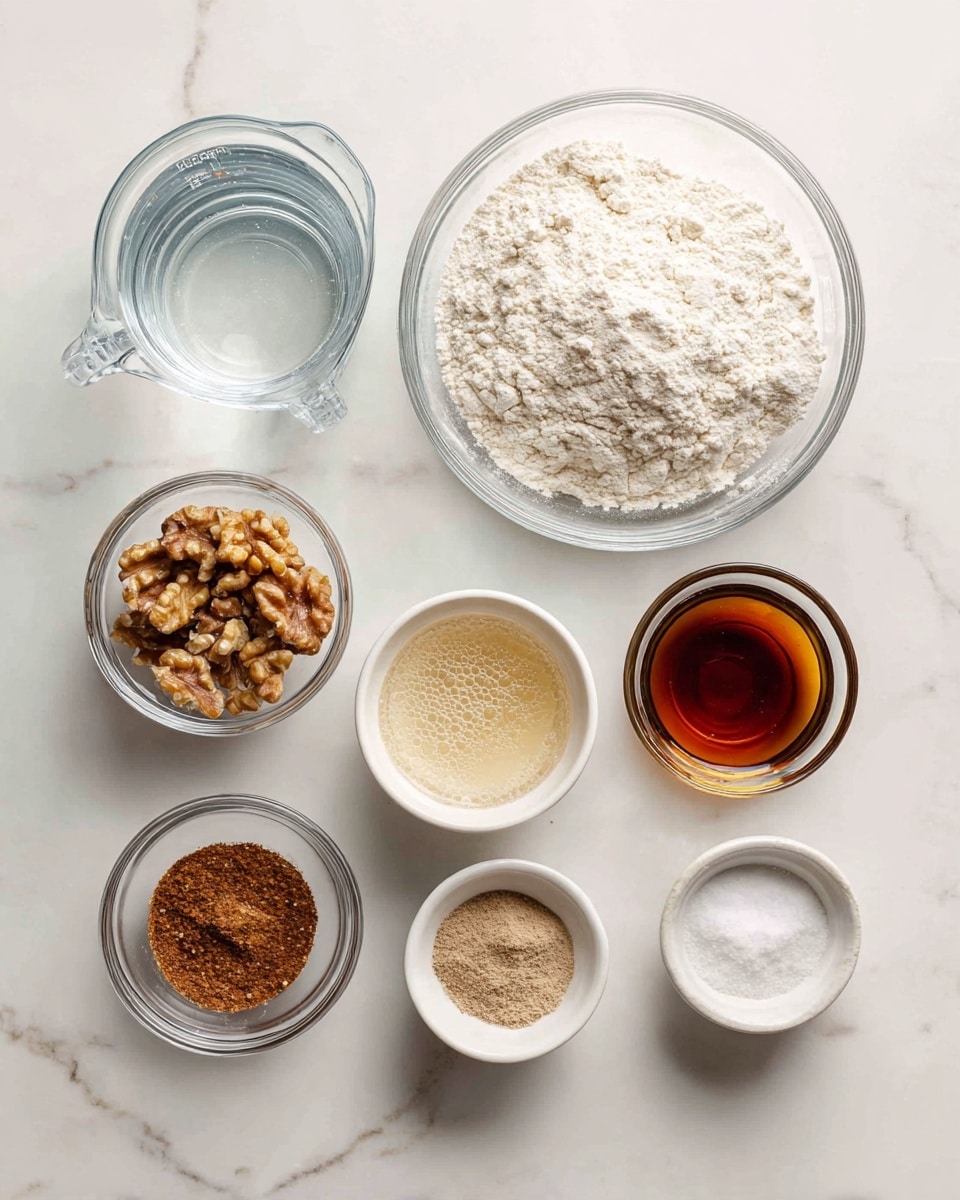
This recipe uses simple yet essential ingredients that come together to create a bread bursting with flavor, texture, and that perfect golden color. Each ingredient plays a crucial role, from providing structure and tang to adding nutty sweetness and warm spice.
- Sourdough starter (100 grams): The heart of the bread that brings natural fermentation and tangy flavor.
- Honey (100 grams): Adds a subtle sweetness and helps develop a chewy crumb and a beautifully caramelized crust.
- Water (330 grams): Hydrates the dough, ensuring softness and elasticity for a great rise.
- Bread flour (500 grams): Gives the dough necessary strength and gluten development for that airy, resilient texture.
- Salt (12 grams): Balances flavors and controls fermentation for a perfectly seasoned loaf.
- Walnuts (90 grams): Toasted for a deep, nutty crunch that complements the honey perfectly.
- Cinnamon (4 grams): Infuses warmth and a subtle spicy note that marries beautifully with honey and walnuts.
How to Make Honey Walnut Sourdough Bread Recipe (Sweet, Nutty & Spiced) Recipe
Step 1: Preparing the Dough
Start by mixing your active sourdough starter with honey and filtered room-temperature water until it turns into a luscious, golden milky liquid. This mix will give your dough a beautiful base of flavor and natural sugars to feed the yeast. Next, add the bread flour and salt directly into the wet mixture and stir until all the flour is incorporated. Expect a wet, sticky dough—not a tight ball—and that’s exactly what you want for this bread!
Step 2: First Stretch and Fold
Cover your dough and let it rest for 30 minutes. Then, with slightly wet fingers, gently lift and fold the dough over itself several times while rotating the bowl. This technique builds gluten strength and smoothness in your dough. After four to six folds, cover it again and rest for another 30 minutes. Your dough is starting to glow!
Step 3: Toast and Add Walnuts & Cinnamon
While the dough rests, toast those walnuts in a small skillet on medium-low heat until fragrant—just about five minutes. Toasting deepens their flavor and softens any bitterness. Once cool, roughly chop them. Sprinkle the walnuts and cinnamon over the dough and lock them in with a second round of stretch and folds, then let it rest 30 more minutes. This is where the magic of flavor really kicks in.
Step 4: Repeat Stretch and Folds
Perform a total of four rounds of stretch and folds spaced 30 minutes apart. Each round will make your dough smoother and stronger while evenly distributing the sweet, nutty, and spiced additions. Between these folds, keep the dough covered and cozy.
Step 5: Bulk Fermentation
After your final set of stretch and folds, cover your dough and leave it to bulk ferment on the counter at about 70 degrees F for 7 to 9 hours. You’ll want to watch for signs like the dough increasing in size by 75%, developing bubbles on top, and gently pulling away from its bowl. This stage can vary depending on room temperature but is key to the bread’s amazing texture and flavor.
Step 6: Pre-shape and Rest
Gently release the dough from the bowl and shape it loosely with another round of stretch and fold on your counter. Flip it seam-side down, cover, and let it rest for 30 minutes. Meanwhile, get your proofing basket ready by dusting it with flour to prevent sticking.
Step 7: Final Shaping and Cold Proof
Flip the dough so the seam is facing up, then carefully fold each side into the center, creating tension on the surface as you round it. Turn it seam-side down and repeat gentle tension pulls until the dough feels smooth and tight. Place it seam-side up into your floured proofing basket, cover it, and refrigerate anywhere from 8 to 72 hours. This slow, cold proof deepens the flavor and adds complexity to your loaf.
Step 8: Scoring and Baking
About 30 minutes before baking, place your dough in the freezer to firm up for better scoring. Preheat your oven to 500 degrees F with a Dutch oven inside for at least 30 minutes. Turn your dough out onto parchment, score a crescent moon on top to allow expansion, then carefully place it in the Dutch oven. Bake covered at 450 degrees F for 30 minutes, remove the lid, then bake at 425 degrees for an additional 10-15 minutes until golden brown and the internal temperature reaches at least 205 degrees F. Remove and cool completely before slicing.
How to Serve Honey Walnut Sourdough Bread Recipe (Sweet, Nutty & Spiced) Recipe

Garnishes
A thick smear of creamy butter paired with a drizzle of honey brings out the sweet and nutty notes of this sourdough perfectly. For an extra touch, sprinkle a few chopped walnuts on top after spreading butter for a lovely crunch and abundance of texture.
Side Dishes
This bread shines alongside soups like butternut squash or tomato bisque, where the spices and walnut crunch elevate the entire meal. It also pairs beautifully with sharp cheeses, fig jam, or fresh fruit for a delightful brunch or snacking platter.
Creative Ways to Present
To impress your guests, serve toasted slices alongside a honey-cinnamon butter or make open-faced sandwiches with goat cheese, thin apple slices, and a few walnut pieces. Because it’s so flavorful on its own, simple presentations highlight its layers of taste without overpowering it.
Make Ahead and Storage
Storing Leftovers
Keep your leftover Honey Walnut Sourdough Bread Recipe (Sweet, Nutty & Spiced) Recipe fresh by storing it at room temperature in a paper or linen bag. This keeps the crust crisp and the crumb tender for up to three days. Avoid plastic bags, which trap moisture and soften the crust undesirably.
Freezing
If you want to enjoy this bread beyond a few days, wrap either the whole loaf or sliced pieces tightly in plastic wrap and place them in a freezer bag. Properly stored, it can last up to three months in the freezer without losing flavor or texture.
Reheating
When you’re ready to enjoy frozen bread, thaw it at room temperature first. For a fresh-from-the-oven feeling, warm slices in a toaster or oven for a few minutes. This helps revive the crust’s crispness and the chewiness of the crumb.
FAQs
Can I use a different nut instead of walnuts?
Absolutely! While toasted walnuts complement the flavor beautifully, you can swap them for pecans, almonds, or pistachios. Just toast and roughly chop to maintain that lovely crunch your bread deserves.
Why does the dough feel so sticky? Is that normal?
Yes, this recipe calls for a wet, sticky dough. It’s key for developing an open, chewy crumb. Handling it with wet fingers and doing those stretch and folds will give you the strength the dough needs without sticking to everything.
What if my sourdough starter isn’t very active?
An active starter is essential for a good rise and flavor. If your starter seems sluggish, feed it a few times ahead of baking day to build strength, or let the bulk ferment time be a bit longer. Watching dough behavior is best over the clock.
Can I skip the cold proof in the fridge?
Skipping the cold proof shortens total time but sacrifices some depth of flavor and texture. The cold proof allows the dough to develop complex flavors and makes for a better crust. You can let it proof at room temperature, but be mindful of timing and watch closely.
Why does cinnamon slow down fermentation?
Cinnamon contains compounds that can inhibit yeast activity, making your dough take a bit longer to ferment. Be patient during bulk fermentation, and trust your dough’s look and feel rather than relying solely on timing.
Final Thoughts
Making this Honey Walnut Sourdough Bread Recipe (Sweet, Nutty & Spiced) Recipe is one of the most rewarding baking adventures you can take on. Each bite offers that perfect balance of sweet, nutty, and warmly spiced goodness. I encourage you to dive in, enjoy the process, and soon you’ll have a loaf that warms your kitchen and heart over and over again.
Print
Honey Walnut Sourdough Bread Recipe (Sweet, Nutty & Spiced) Recipe
- Total Time: 10 to 12 hours (including bulk and cold fermentation)
- Yield: 1 standard 9-inch loaf
- Diet: Vegetarian
Description
This Honey Walnut Sourdough Bread recipe combines the nutty richness of toasted walnuts, the natural sweetness of honey, and a hint of warm cinnamon to create a beautifully textured artisan loaf. Perfectly chewy with a golden crust and a soft, flavorful crumb, this bread is ideal for breakfast with butter and honey or as a unique twist on traditional sourdough.
Ingredients
Wet Ingredients
- 100 grams sourdough starter (1/2 cup)
- 100 grams honey (scant 1/3 cup)
- 330 grams water (1 1/4 cups + 2 tablespoons), filtered, room temperature
Dry Ingredients
- 500 grams bread flour (3 1/2 cups)
- 12 grams salt (2 teaspoons)
- 4 grams ground cinnamon (2 teaspoons)
Mix-ins
- 90 grams walnuts (3/4 cup), toasted and roughly chopped
Instructions
- Make the Dough: In a large mixing bowl, combine the active sourdough starter, honey, and room temperature filtered water. Mix thoroughly with a dough whisk or your hand until mixture appears golden and milky. Add bread flour and salt to the wet ingredients and mix until no dry flour remains; expect a wet, sticky dough rather than a uniform ball. Cover the bowl with plastic wrap and let rest for 30 minutes.
- Stretch and Folds – Round 1: With slightly wet fingers, lift a portion of dough and stretch it above the bowl, folding it back over the dough. Rotate the bowl a quarter turn and repeat until you complete a full circle (4-6 folds). Cover and let rest for another 30 minutes.
- Prepare Walnuts: Heat a small skillet over medium-low heat and toast walnuts for about 5 minutes until fragrant, stirring frequently to avoid burning. Remove from heat and let cool to room temperature, then roughly chop.
- Stretch and Folds – Round 2 with Mix-ins: Sprinkle toasted walnut pieces and ground cinnamon evenly over the dough. Perform another full set of stretch and folds to incorporate mix-ins. Cover and rest for 30 minutes.
- Repeat Stretch and Folds: Perform 2 more rounds of stretch and folds with 30-minute rests in between, totaling 4 rounds. Cover the dough after each round.
- Bulk Fermentation: After the final stretch and fold, cover the dough and let it bulk ferment at 70°F for about 7-9 hours, or until the dough increases in size by at least 75%, is domed on top, jiggles when shaken, has visible bubbles, pulls away easily from the bowl, and passes a windowpane test without tearing.
- Pre-shape: With slightly wet fingers, gently release the dough from the bowl keeping bubbles intact. Let the dough rest on the counter, shaping it with one more round of stretch and folds to form a rough round. Flip the dough so the seam is on the counter, cover it with a bowl, and rest for 30 minutes.
- Prepare Proofing Basket: Dust a banneton or a small mixing bowl lined with a tea towel with flour (rice flour or all-purpose flour) to prevent sticking.
- Final Shape: Flip the dough with seam side up, perform folds pulling each side towards the center and then fold the top down. Flip the dough again to seam side down. Shape into a tight ball by gently cupping and rotating the dough clock-wise, pulling towards you lightly without tearing. Place dough seam side up into the floured proofing basket and cover with plastic or a shower cap.
- Cold Proof: Refrigerate the dough in the basket for 8–72 hours. This slower fermentation enhances flavor and allows flexible baking timing but avoid over-proofing to prevent poor oven spring.
- Scoring Preparation: Thirty minutes before baking, place the dough in the freezer and preheat a Dutch oven in the oven to 500°F for at least 30 minutes.
- Score and Bake: Turn the dough out onto parchment paper, seam side down. Score a crescent moon shape on the top with a lame or razor blade. Using the parchment corners, place the dough into the preheated Dutch oven and cover with the lid. Reduce oven temperature to 450°F and bake covered for 30 minutes.
- Finish Baking: Remove the lid and continue baking at 425°F for an additional 10-15 minutes uncovered. If crust browns too quickly, tent with aluminum foil. The bread is done when the crust is golden and internal temperature reaches at least 205°F.
- Cool: Remove bread from Dutch oven using parchment paper and transfer to a wire rack. Allow to cool at least 1 hour before slicing to prevent gummy texture. Enjoy with butter and honey for best flavor.
Notes
- Bread Flour: Preferred for higher protein content that strengthens dough for superior rise. Other flours like all-purpose, whole wheat, spelt, or rye can be used but may affect texture.
- Honey: Adds subtle sweetness and chewy crumb but accelerates fermentation and yields a darker crust. Any honey type works; darker honeys provide deeper flavor.
- Walnuts: Toasting mellows bitterness and enhances flavor but is optional. Walnuts can be substituted with pecans, almonds, pistachios, or mixed nuts.
- Cinnamon: Complements honey and walnuts but slows yeast activity, potentially lengthening bulk fermentation.
- Storage: Store at room temperature in paper or linen bags up to three days to keep crust crisp. Freeze sliced or whole loaves wrapped tightly up to three months. Avoid refrigeration as it dries out bread and affects texture.
- Prep Time: 1 hour 30 minutes
- Cook Time: 45 minutes
- Category: Bread
- Method: Baking
- Cuisine: American


