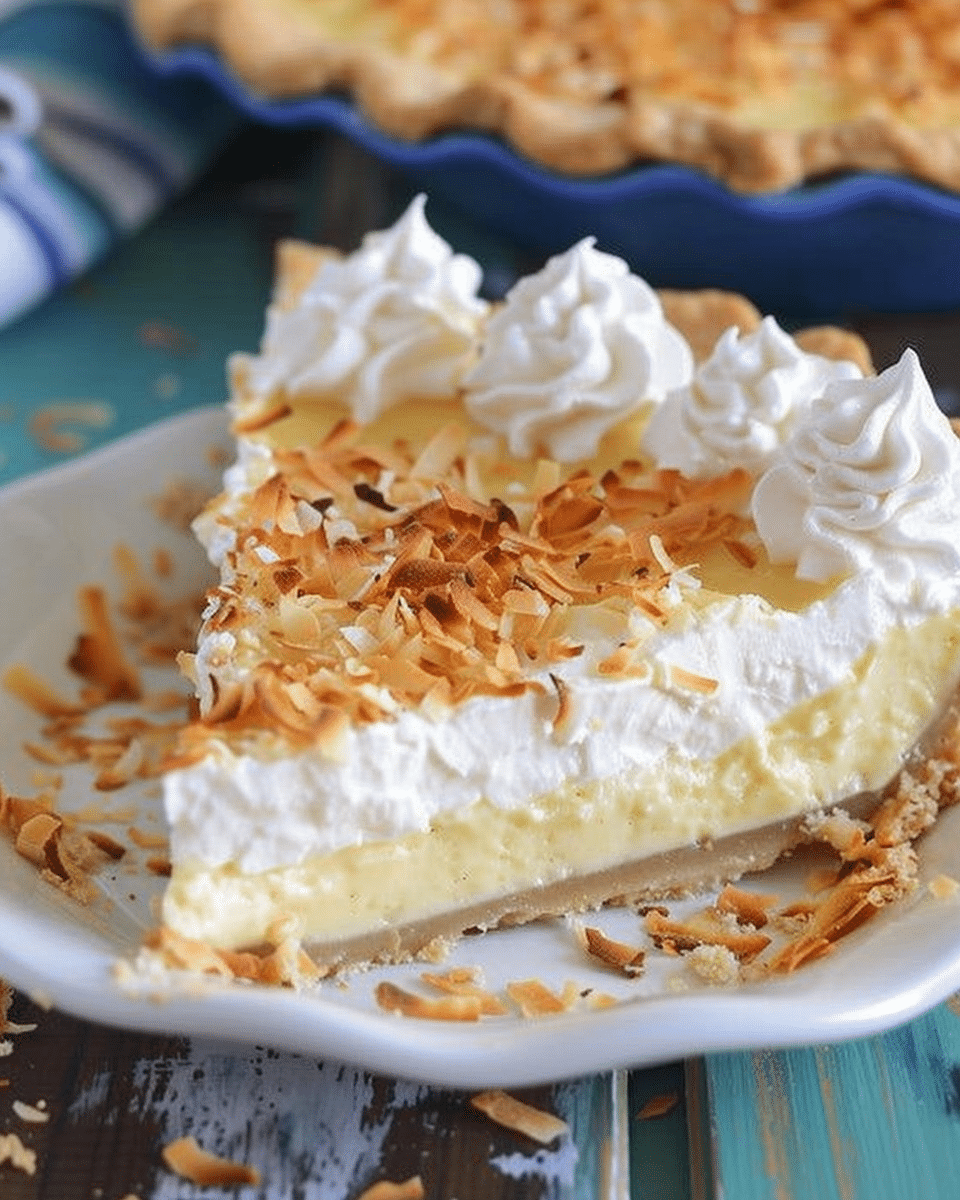
I love making Dad’s Coconut Cream Pie because it brings together the rich, velvety coconut filling and a crisp, flaky pie crust in the most comforting way. The creamy coconut custard, topped with sweetened whipped cream and toasted coconut, creates the perfect balance of textures and flavors. It’s a nostalgic recipe that brings family together and is always a crowd-pleaser at any gathering or special occasion.
Why I’ll Love This Recipe
This pie is my go-to dessert for its creamy richness and delicate coconut flavor. The homemade coconut custard is smooth and not too sweet, complemented by the light, fluffy whipped cream topping. I love how the toasted coconut gives it an extra crunch, making every bite satisfying. Plus, it’s one of those recipes that’s always loved by everyone and perfect for any time of year, especially during the holidays or for summer gatherings.
Ingredients
(Here’s a tip: Check out the full list of ingredients and measurements in the recipe card below.)
For the Pie Crust:
-
1 pre-baked pie crust (or homemade if you prefer)
For the Coconut Custard Filling:
-
2 cups whole milk
-
1 cup heavy cream
-
3/4 cup granulated sugar
-
1/4 teaspoon salt
-
1/2 cup unsweetened shredded coconut
-
4 large egg yolks
-
3 tablespoons cornstarch
-
2 tablespoons unsalted butter
-
1 teaspoon vanilla extract
-
1 teaspoon coconut extract (optional, for more coconut flavor)
For the Topping:
-
1 cup heavy cream
-
2 tablespoons powdered sugar
-
1 teaspoon vanilla extract
-
1/2 cup sweetened shredded coconut, toasted
Directions
-
Prepare the Pie Crust: If using a store-bought pie crust, I bake it according to the package instructions until golden and crisp, then set it aside to cool. If making a homemade crust, bake it and let it cool before filling.
-
Make the Coconut Custard: In a medium saucepan, I combine the milk, heavy cream, sugar, salt, and shredded coconut over medium heat. I stir occasionally, heating it until it’s just about to simmer, but not boiling.
-
Whisk the Egg Yolks and Cornstarch: While the milk mixture is heating, I whisk together the egg yolks and cornstarch in a separate bowl until smooth.
-
Temper the Egg Yolks: Once the milk mixture is hot (but not boiling), I slowly pour about 1/2 cup of the hot mixture into the egg yolks while whisking constantly to prevent curdling. Then, I slowly pour the tempered egg yolk mixture back into the saucepan with the rest of the milk mixture, whisking constantly.
-
Thicken the Custard: I cook the mixture over medium heat, whisking constantly until it thickens and starts to bubble. Once it thickens to a pudding-like consistency, I remove it from the heat.
-
Finish the Custard: I stir in the butter, vanilla extract, and coconut extract (if using) until smooth and combined. Let it cool slightly.
-
Fill the Pie Crust: I pour the warm coconut custard filling into the cooled pie crust and smooth the top with a spatula. Then, I cover the pie with plastic wrap, making sure the wrap touches the surface of the filling to prevent a skin from forming.
-
Chill the Pie: I refrigerate the pie for at least 4 hours, or overnight if I have the time, until it’s fully set and chilled.
-
Make the Whipped Cream Topping: In a mixing bowl, I whip the heavy cream, powdered sugar, and vanilla extract until soft peaks form.
-
Toast the Coconut: While the pie is chilling, I toast the sweetened shredded coconut in a dry pan over medium heat, stirring constantly until golden brown. I then remove it from the heat and let it cool.
-
Top the Pie: Once the pie is chilled, I top it with the whipped cream, spreading it evenly over the custard. Then, I sprinkle the toasted coconut over the whipped cream as a garnish.
Servings and Timing
This recipe yields 8 servings. Prep time is about 15 minutes, cooking time is around 10 minutes, and chilling time is about 4 hours, making this a great make-ahead dessert.
Variations
I like to change it up by:
-
Adding a little bit of dark chocolate shavings or drizzle for a chocolate-coconut combo.
-
Using a graham cracker crust instead of a regular pie crust for a slightly different texture and flavor.
-
Mixing in some white chocolate chips into the coconut custard for extra richness.
-
For a lighter version, I can use whipped coconut cream in place of the heavy whipped cream topping.
Storage / Reheating
I store the Coconut Cream Pie in the refrigerator, covered, for up to 3 days. It’s best enjoyed cold and fresh, so I don’t recommend freezing it, as the texture of the custard may change.

FAQs
1. Can I use a store-bought pie crust?
Yes! A store-bought or pre-made pie crust works perfectly in this recipe. Just make sure it’s fully baked and cooled before adding the filling.
2. Can I use coconut milk instead of heavy cream in the custard?
You can substitute coconut milk for the heavy cream to make it more coconut-flavored, but keep in mind the texture may be a little different. I recommend using full-fat coconut milk for the best consistency.
3. How do I prevent the filling from curdling?
The key to preventing curdling is to temper the egg yolks by slowly adding some of the hot liquid to them before combining them with the rest of the mixture. Whisk constantly, and cook on medium heat to avoid overheating.
4. Can I make this pie ahead of time?
Yes, this pie can be made up to a day in advance. It actually sets better when chilled for several hours or overnight, which makes it a great make-ahead dessert.
5. Can I make this pie dairy-free?
Yes! You can make a dairy-free version by using coconut milk in place of heavy cream and a dairy-free whipped topping or coconut cream for the whipped cream topping.
Conclusion
Dad’s Coconut Cream Pie is the ultimate dessert for coconut lovers! With its creamy, smooth coconut custard, flaky crust, and whipped cream topping, this pie is the perfect treat for family gatherings, special occasions, or any time you want a decadent, comforting dessert.

Dad’s Coconut Cream Pie
5 Stars 4 Stars 3 Stars 2 Stars 1 Star
No reviews
- Author: Sophia
- Total Time: 4 hours 15 minutes (including chilling)
- Yield: 8 servings
- Diet: Gluten Free
Description
Dad’s Coconut Cream Pie features a rich coconut custard, smooth and creamy filling, topped with sweetened whipped cream and toasted coconut. A comforting, nostalgic dessert perfect for any occasion.
Ingredients
1 pre-baked pie crust (or homemade if you prefer)
2 cups whole milk
1 cup heavy cream
3/4 cup granulated sugar
1/4 teaspoon salt
1/2 cup unsweetened shredded coconut
4 large egg yolks
3 tablespoons cornstarch
2 tablespoons unsalted butter
1 teaspoon vanilla extract
1 teaspoon coconut extract (optional, for more coconut flavor)
1 cup heavy cream (for topping)
2 tablespoons powdered sugar
1 teaspoon vanilla extract (for topping)
1/2 cup sweetened shredded coconut, toasted (for topping)
Instructions
- Prepare the Pie Crust: Bake the pie crust according to the package instructions, then set it aside to cool. If using a homemade crust, bake and cool before filling.
- Make the Coconut Custard: Combine the milk, heavy cream, sugar, salt, and shredded coconut in a medium saucepan over medium heat. Stir occasionally, heating until it’s about to simmer but not boiling.
- Whisk the Egg Yolks and Cornstarch: In a separate bowl, whisk together the egg yolks and cornstarch until smooth.
- Temper the Egg Yolks: Slowly pour 1/2 cup of the hot milk mixture into the egg yolks, whisking constantly to prevent curdling. Gradually pour the egg yolk mixture back into the saucepan while whisking continuously.
- Thicken the Custard: Cook the mixture over medium heat, whisking constantly until it thickens and bubbles. Once thickened to a pudding-like consistency, remove it from the heat.
- Finish the Custard: Stir in the butter, vanilla extract, and coconut extract (if using) until smooth. Let the custard cool slightly.
- Fill the Pie Crust: Pour the warm custard into the cooled pie crust and smooth the top with a spatula. Cover with plastic wrap, pressing it against the surface to prevent a skin from forming.
- Chill the Pie: Refrigerate the pie for at least 4 hours, or overnight for best results.
- Make the Whipped Cream Topping: Whip the heavy cream, powdered sugar, and vanilla extract in a mixing bowl until soft peaks form.
- Toast the Coconut: Toast the sweetened shredded coconut in a dry pan over medium heat, stirring constantly until golden brown. Remove from heat and let it cool.
- Top the Pie: Once the pie is chilled, spread the whipped cream evenly over the custard. Sprinkle the toasted coconut on top as garnish.
Notes
This pie is best enjoyed cold and fresh. Store it in the refrigerator, covered, for up to 3 days.
If making ahead, chill for at least 4 hours or overnight to ensure it sets properly.
You can customize the crust by using a graham cracker crust or adding a chocolate drizzle for a different flavor twist.
For a dairy-free version, use coconut milk instead of heavy cream and a coconut cream topping in place of whipped cream.
- Prep Time: 15 minutes
- Cook Time: 10 minutes
- Category: Dessert
- Method: Chilled, Baked
- Cuisine: American
Nutrition
- Serving Size: 1 slice
- Calories: 400
- Sugar: 26g
- Sodium: 120mg
- Fat: 28g
- Saturated Fat: 16g
- Unsaturated Fat: 8g
- Trans Fat: 0g
- Carbohydrates: 35g
- Fiber: 2g
- Protein: 4g
- Cholesterol: 90mg

